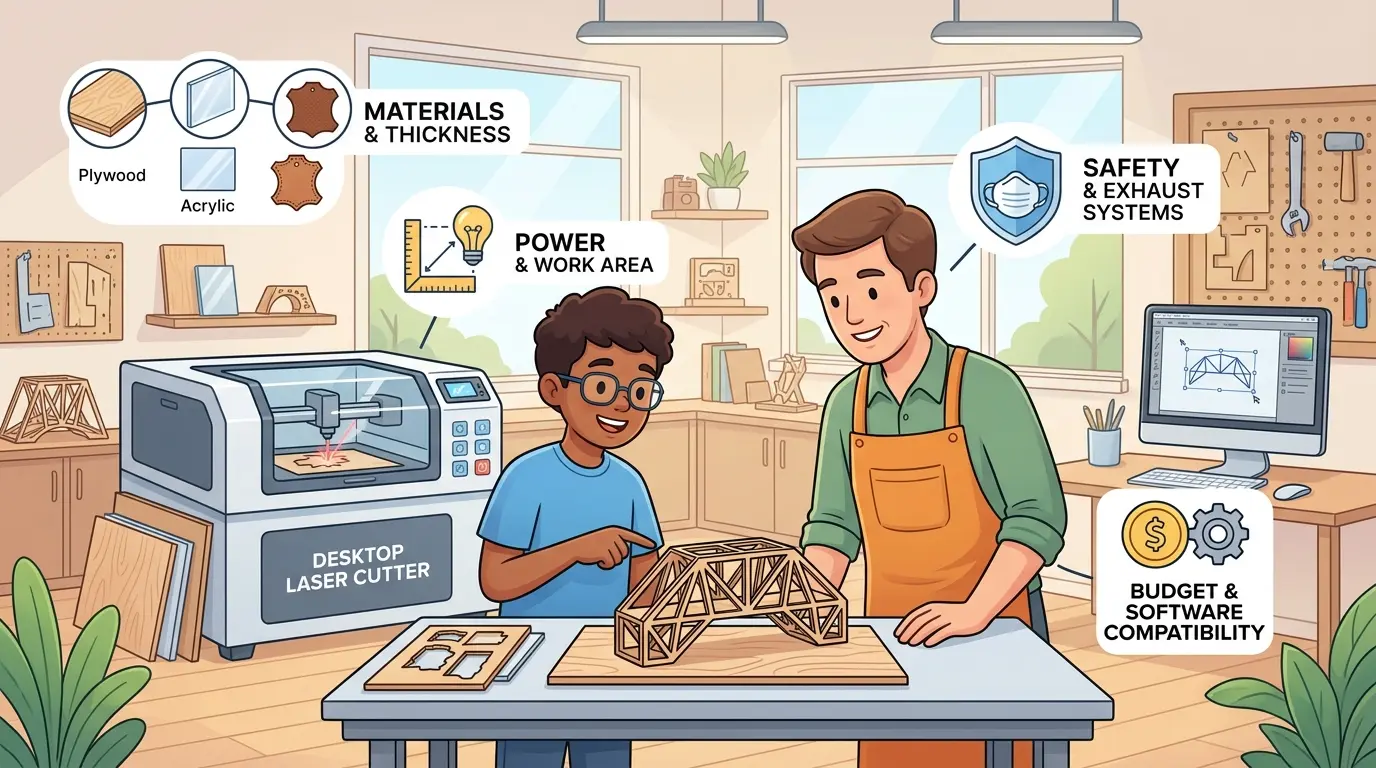
A desktop laser cutter sounds like a straightforward bench-top purchase until it has to serve several roles at once: quick design mockups, classroom exercises, engineering proof parts, and small batches of presentation-ready samples. In those environments, the real decision is not whether a smaller laser can fit into the room. It is whether the machine can stay predictable when users, materials, and job priorities keep changing.
For teams comparing laser cutters and engravers for wood, acrylic, and similar non-metal work, the better question is not simply “Can this machine cut the material?” The better question is “Can a desktop format support our actual workflow without turning setup, supervision, and repeatability into the real bottlenecks?”
Why Prototyping and Education Need a Different Selection Logic
A desktop unit is usually chosen because space is limited, access needs to be easy, and the work is not yet at full production scale. That logic is sound. But those same advantages also change the buying criteria.
A prototyping lab cares about short iteration loops. An education lab cares about teachability, user turnover, and reset simplicity. A sample room inside a factory often cares about visual quality and timing more than raw daily volume. None of those settings behaves like a dedicated production line, so the best desktop system is rarely the one chosen on speed claims alone.
| Environment | Main Goal | What the Machine Must Protect | Where Friction Usually Starts |
|---|---|---|---|
| Product Design Lab | Fast mockups and revisions | Quick turnaround and acceptable part quality | Repeated setup changes between small jobs |
| Engineering Classroom | Teach file-to-part workflow | Clear controls and repeatable baseline settings | Too many manual adjustments between users |
| Technical Training Center | Demonstrate real process logic | Stable operation and easy supervision | Extraction, cleaning, and reset time becoming instructor work |
| Sample Room for Commercial Teams | Produce approval parts and proof samples | Consistent visual results across repeat runs | Treating desktop capacity like production capacity |
That is why desktop laser selection should start with workflow fit. A machine that is easy to teach and easy to return to a stable baseline can be more valuable in these settings than a machine that only looks strong on a single demonstration sample.
Define the Real Teaching or Prototype Workflow
“Prototyping and education” sounds like one category, but it usually hides very different use cases. Before comparing machines, buyers should clarify what the machine is actually expected to do every week.
Key questions include:
- Are Users Mainly Cutting Small Acrylic Mockups, Engraving Wood Samples, Or Doing Both?
- Is the Primary Goal Concept Validation, Process Training, Or Client-Facing Sample Making?
- Will One Trained Operator Run the Machine, Or Will Many Students or Lab Users Share It?
- Are the Jobs Mostly One-Offs, Or Will the Same Exercises and Part Files Repeat Across Semesters or Project Cycles?
- Does the Lab Need Fast Operator Handoff, Or Can Each Job Be Supervised End to End?
These questions matter because they change what “good performance” means. A teaching lab may accept slightly slower output if operation is clearer and more repeatable. A design lab may accept more manual setup if the machine handles frequent material changes well. A commercial sample room usually cares more about predictable presentation quality than about how many parts the machine could theoretically produce in a shift.
Material Range Matters More Than a Headline Power Number
Desktop laser discussions often get pulled toward headline power, but the weekly material mix usually matters more. This article is mainly about wood, acrylic, model-making boards, and similar non-metal materials. If the planned work is primarily metal, it should be evaluated as a different process decision rather than folded into the same desktop shortlist.
Even within non-metal work, materials place very different demands on the same machine.
| Material Or Task | What Users Usually Expect | Common Desktop Challenge |
|---|---|---|
| Acrylic Mockups | Clean edges and visually acceptable finish | Heat haze, residue, or inconsistent edge appearance |
| Wood Samples and Engraved Panels | Legible detail and controlled burn marks | Surface variation and darker-than-expected edges |
| Model Board or Thin Sheet Prototypes | Fast turnaround and clean small parts | Warping, smoke effects, or unstable hold-down |
| Mixed Classroom Projects | Easy repeatability across different jobs | Time lost resetting parameters between users |
The most useful buying approach is to rank materials by how often they appear, not by which sample is most impressive in a demo. If acrylic display parts and engraved wood samples consume most of the machine time, then edge cleanliness, extraction stability, and repeatable preset management matter more than an occasional ability to push a more difficult test job.
Safety, Supervision, and Reset Time Are Operational Issues
In education and prototyping environments, safety and workflow control should be treated as operational requirements rather than secondary accessories. A desktop laser can be compact and accessible, but it still creates fumes, heat, residue, and user-error risk if the surrounding process is loose.
What usually matters most in day-to-day use is not only whether the machine can run a job, but whether it can be handed from one user to another without confusion or cleanup delays. Buyers should pay close attention to:
- Enclosed Operation and Clear Visibility During a Run
- Reliable Extraction Workflow for the Materials Used Most Often
- Simple Job Setup and Origin-Setting Procedures
- Repeatable Preset or Recipe Management for Recurring Projects
- Easy Cleaning and Maintenance Access Between Classes or Lab Sessions
- Supervision Rules That Fit the Actual Staffing Model
Education buyers should also verify their local ventilation, supervision, and safety requirements before final selection. A desktop machine that produces acceptable parts but is difficult to supervise or reset between users will usually create more lost time than a slightly less aggressive system that stays easier to manage.
Desktop Laser Cutter vs Full-Size Production System
A desktop laser cutter is not a smaller version of every industrial laser workflow. It solves a different problem.
| Decision Factor | Desktop Laser Cutter | Full-Size Production Laser |
|---|---|---|
| Best Fit | Prototyping, Training, Mockups, and Proof Samples | Sustained Batch Work and Larger Production Loads |
| Work Envelope | Better for Smaller Parts and Limited Bench-Space Environments | Better for Larger Sheets and More Continuous Output |
| User Access | Easier to Place in Labs and Teaching Spaces | Better Suited to Controlled Production Areas |
| Changeover Style | Often Practical for Frequent Short Jobs | More Efficient Once Jobs and Routines Are Standardized |
| Throughput Expectation | Good for Low-Volume Iteration | Better for Recurring Commercial Output |
| Buying Logic | Simplicity, Safety, Flexibility, and Learning Value | Runtime Stability, Throughput, and Production Efficiency |
Neither option is universally better. A desktop system is often the smarter choice when the goal is faster learning, faster proofing, and lower-risk experimentation. A full-size production system becomes more relevant when job size, runtime stability, or recurring output volume starts to dominate the decision.
When a Desktop System Is Enough and When To Scale
A desktop laser cutter is commonly a strong fit when:
- Parts Are Small Enough That Repeated Reloading Does Not Dominate the Workflow
- The Main Goal Is Concept Validation, Teaching, Or Approval Samples
- Different Users Need Accessible Entry Into Laser-Based Cutting or Engraving
- Low-Volume Flexibility Matters More Than Daily Throughput
- The Machine Is Expected to Support Iteration, Not Replace a Full Production Cell
It is usually time to think beyond desktop format when:
- Workpiece Size Is Becoming a Routine Limitation
- More Time Is Spent Loading, Repositioning, Or Splitting Jobs Than Actually Processing Parts
- Multiple Classes, Teams, Or Departments Are Competing for the Same Machine Hours
- Prototype Work Is Turning Into Recurring Commercial Output
- The Lab Now Needs More Stable Throughput Than a Small-Format Workflow Can Realistically Support
If the desktop machine is the first step in a broader equipment plan, reviewing the Pandaxis product catalog can help teams compare whether the next stage should remain laser-based or move toward a different production method altogether. That matters because some prototype parts stay within laser processing as they scale, while others eventually fit better in another workflow once sheet size, repeat volume, or downstream machining needs become more important.
Practical Summary
A desktop laser cutter can be an excellent fit for prototyping and education when the real goal is fast iteration, accessible training, and repeatable non-metal sample work in a compact space. The strongest buying decision usually comes from matching the machine to recurring materials, user turnover, supervision reality, and the size of the parts being made most often.
If the work stays small-format and low-volume, a desktop unit can be a practical long-term tool. If the same workflow starts demanding larger sheets, cleaner repeat output across longer runs, or more sustained throughput, the desktop machine should be treated as a proofing and teaching asset rather than stretched into a production role it was never meant to fill.