Pandaxis

  • Products
    • CNC Nesting Machines
    • Panel Saws (Beam Saws)
    • Sliding Table Saws
    • Edgebanders
    • Boring & Drilling Machines
    • Wide Belt Sanders
    • Laser Cutters and Engravers
    • Stone CNC Machines
  • About Us
  • Contact Us
  • EnglishEnglish
    • Español Español
    • Italiano Italiano
    • Deutsch Deutsch
    • Français Français
    • Português Português
    • العربية العربية
    • Türkçe Türkçe
    • Русский Русский
    • Tiếng Việt Tiếng Việt
    • 한국어 한국어
    • 日本語 日本語
    • 简体中文 简体中文
  • Home
  • Blog
  • Blog
  • Metal Engraving: How To Choose the Right Machine for the Job

Metal Engraving: How To Choose the Right Machine for the Job

by pandaxis / Sunday, 03 May 2026 / Published in Blog

Metal engraving decisions fail not at the demo bench but weeks later, when a deep mark slows the line, fine text blurs on polished stainless, or a traceability code passes the eye yet fails the downstream scanner. The real selection problem is matching process to production reality: fiber laser, mechanical rotary, dot peen, scribe, or CNC. Each behaves differently on oil-covered castings, curved geometry, or coated surfaces. Define mark permanence, surface condition, throughput, and verification before comparing machines, because the wrong label choice generates rework that no specification sheet can prevent.

Why Metal Engraving Decisions Go Wrong After the Demo

The wrong metal engraving machine rarely fails during the demonstration. It fails later, when deep marks slow down the line, fine text loses clarity on polished parts, or a traceability code looks acceptable to the eye but becomes unreliable under real scanner checks.

That is why choosing a metal engraving machine is not really about the broad keyword. It is about matching the process to the part, the finish standard, the required permanence, and the production rhythm. In real factories, that can mean comparing fiber laser systems, mechanical engravers, CNC machining centers, dot peen markers, or scribe systems, even though buyers may search for all of them under the same label.

The gap between a sample-bench demonstration and a live production environment is where most purchasing mistakes surface. On a clean sample coupon, nearly every process looks acceptable. The mark is crisp, the cycle time seems reasonable, and the operator has time to position the part carefully. In production, the same part arrives with residual oil, a slightly different cast texture, or a tolerance stack-up that shifts the marking position by half a millimeter. The machine that impressed during the demo now produces inconsistent depth, intermittent contrast, or codes that fail verification on the first pass.

This article walks through the real selection logic: what the term metal engraving actually covers, how each machine type behaves under shop-floor conditions, and which questions separate a sound investment from a costly rework generator.

What “Metal Engraving” Actually Covers

Metal engraving can refer to several very different production goals:

  • Permanent part identification for traceability and warranty tracking
  • High-contrast serial numbers and data matrix codes for automated scanning
  • Decorative logos and brand marks on finished components
  • Deep tooling, mold, or fixture identification that must survive heavy use
  • Engraved plates, tags, nameplates, and control panels

Those jobs do not ask for the same machine. Some applications need speed and contrast. Others need true physical depth. Some need a cleaner cosmetic result on finished stainless or anodized aluminum. Others need a rugged mark on rough castings that will still be readable after handling, paint, blasting, or field wear.

The distinction between marking and engraving matters more than most buyers expect. Marking changes the surface appearance without significant material removal. Engraving physically displaces or removes material to create a groove with measurable depth. A fiber laser operating in a marking regime may produce excellent contrast on stainless steel, but if the requirement calls for a groove deep enough to survive abrasive blasting, the same laser may need multiple passes at reduced speed, which changes the throughput calculation entirely.

Similarly, a mechanical engraver that cuts a clean 0.2 mm groove in brass may struggle to maintain that depth consistency across a cast aluminum part with varying hardness. The process that wins on one material family can lose badly on another.

If the requirement is not defined clearly at the start, the buying process tends to go off course. A factory may end up paying for more machine than the workflow uses, or worse, for a system that looks capable on samples but creates rework once production conditions become less controlled.

The Main Machine Types and Where They Fit

Machine Type Common Production Fit Main Strengths Main Tradeoffs
Fiber laser marking or engraving system Fast traceability, logos, fine text, and compact codes on many metal parts Non-contact process, strong repeatability, fine detail, and easier automation Result depends heavily on material, surface finish, and the real depth requirement
Mechanical rotary engraving machine Nameplates, tags, fixtures, deeper visible text, and applications needing true cut geometry Real physical cut depth, clean edge control, and good visual permanence Tool wear, slower cycle times on larger areas, and stronger dependence on workholding
CNC engraving or machining center Parts that need engraving plus milling, drilling, or contour work in one setup Combines operations, handles deeper geometry, and supports more complex part work More setup and programming burden when the job is only simple marking
Dot peen or micro-percussion marker Rough industrial parts, castings, forgings, and durable ID marking Robust marks, strong permanence, and good tolerance for uneven surfaces Less refined visual finish, more noise, and limited fit for cosmetic graphics
Scribe marker Chassis-style identification, continuous line marks, and lower-noise industrial marking Clean line quality and durable identification with less impact than dot peen Usually not the first choice for dense 2D codes or visually filled logos

The important point is that the best machine is usually the one that fits the real job, not the one that sounds most advanced in isolation. A fiber laser is not automatically better than a mechanical engraver, and a dot peen marker is not automatically more primitive. Each process has a window of conditions where it performs well, and the selection task is to find which window matches the production reality.

What Buyers Should Define Before Comparing Machines

The fastest way to narrow the shortlist is to define the production requirement in practical terms. Skipping this step leads to comparison shopping based on specifications that may not matter for the actual application.

Start with the function of the mark. Is the mark mainly for traceability, appearance, or depth? A scanner-readable data code on a machined part is a different requirement from a deep engraved tool ID or a decorative brand mark on a finished panel. Traceability marks must survive the part’s entire service life and remain readable by automated systems. Appearance marks must meet a visual standard that may be judged by customers or quality auditors. Depth-driven marks must physically survive abrasion, coating, or repeated handling.

Then check the surface condition. Stainless steel, aluminum, coated parts, plated parts, cast surfaces, and polished surfaces do not respond the same way. Even when the base metal is similar, the process window can change sharply once finish, coating, or texture changes. A laser that produces a dark, high-contrast mark on bead-blasted stainless may produce a barely visible mark on a mirror-polished surface. A mechanical engraver that cuts cleanly through a thin anodized layer may tear or chip the coating on a thicker, harder anodized finish.

Permanence should also be defined honestly. Some parts only need the mark to remain readable through internal handling and packing. Others must stay legible after coating, washing, abrasion, or long service life. In those cases, depth or displacement may matter more than clean contrast alone. A laser mark that looks excellent on the bench may fade or become unreadable after the part passes through a vibratory deburring operation. A dot peen mark with physical displacement may survive the same treatment without issue.

Throughput is another dividing line. A machine that marks one part quickly on a sample bench may still underperform on a live line if part presentation, fixturing, or verification remains slow. Buyers should evaluate the complete cell, not just the marking head or spindle. The total cycle time includes loading, positioning, marking, verification, and unloading. If the marking step takes three seconds but loading and positioning take thirty seconds, the machine’s raw speed is not the bottleneck.

Finally, think about geometry. Flat plates, cylindrical parts, heavy castings, small precision components, and irregular fabricated assemblies all create different fixturing demands. A process that works well on flat coupons may become unstable on curved or tolerance-sensitive parts. A rotary engraver needs rigid workholding to maintain consistent depth across the cut. A laser needs consistent focal distance, which means curved surfaces require either a longer focal length lens, a rotary attachment, or a 3D-capable optical system. A dot peen marker can tolerate more surface variation but may produce inconsistent dot spacing on sharply curved geometry.

When Laser Is Usually the Better Choice

Laser-based systems are commonly preferred when the factory needs speed, fine detail, and repeatable non-contact marking across a steady stream of similar parts.

That is especially true when the workflow depends on:

  • Small text or dense codes that must remain legible at reduced sizes
  • Clean logos on finished components where surface contact could cause damage
  • Fast changeovers between part programs without tool changes
  • Minimal mechanical contact with the part surface
  • Integration with scanners, vision checks, or automated traceability workflows

Laser processes are also attractive when the mark must be placed precisely without cutter wear or stylus contact. For many metal identification jobs, that combination of control and speed is the main reason buyers start there. A fiber laser can mark a data matrix code in under a second on many materials, and the program changeover is essentially instantaneous compared to a mechanical tool change.

The non-contact nature of laser marking also matters for thin-walled parts, finished surfaces, or components that could deform under mechanical pressure. A mechanical engraver applies downward force through the cutter, which can distort thin sections or leave burrs on soft materials. A laser removes material through localized heating and vaporization, which avoids mechanical stress on the part.

But laser is not automatically the best answer just because the word engraving appears in the requirement. If the real job depends on deeper physical removal, survival after heavy surface treatment, or strong readability on rough industrial surfaces, another process may fit better. A fiber laser can achieve measurable depth on some metals, but the process is slower than marking and the depth consistency depends heavily on material composition, surface reflectivity, and thermal conductivity. On aluminum, for example, the high thermal conductivity can make deep laser engraving inconsistent without careful parameter tuning.

When Mechanical, Impact, or CNC Systems Make More Sense

Mechanical engraving usually becomes more attractive when true cut depth matters more than raw speed. This often applies to nameplates, durable fixture IDs, or applications where the visual shape of the cut matters as much as the mark itself. A mechanical engraver cuts a V-shaped or flat-bottomed groove with defined edges, which gives the mark a physical presence that laser marking cannot replicate.

Tool selection plays a significant role in mechanical engraving quality. Carbide cutters handle most non-ferrous metals and plastics well. Diamond-tipped tools extend tool life on abrasive materials like cast aluminum or filled composites. The cutter geometry, spindle speed, and feed rate all influence the final edge quality and depth consistency. A shop that understands these variables can produce consistent, clean engraving across long production runs. A shop that treats the engraver as a set-and-forget machine will see quality drift as tools wear.

Dot peen and scribe systems make sense when the requirement is less about refined appearance and more about durable industrial identification. On rough castings, fabricated structural parts, or shop-floor traceability work, they can outperform more appearance-driven processes simply because they remain readable in harsher conditions. The physical displacement of material creates a mark that survives paint, blasting, and handling better than a surface-level laser mark.

Dot peen markers use a pneumatically or electrically driven stylus that strikes the surface repeatedly to form a pattern of dots. The depth of each dot depends on the impact force, which can be adjusted for different materials. The process tolerates uneven surfaces because each dot is created independently, and the stylus does not need to maintain continuous contact. The tradeoff is a visibly textured mark that may not meet cosmetic standards for finished consumer products.

Scribe markers use a continuous stylus that cuts a line into the surface, similar to a mechanical engraver but with a simpler motion system. They produce cleaner line quality than dot peen and generate less noise, which matters in enclosed production areas. However, they are less flexible for dense 2D codes or filled logos, where the continuous line approach becomes slow and visually cluttered.

CNC engraving or machining centers become the better fit when engraving is only one operation in a broader cycle. If the same part also needs drilling, milling, contouring, or pocketing, combining those steps in one setup can reduce handling and improve positional consistency, even if the engraving step alone is not the fastest possible.

This is where many buyers save or lose money. If engraving is a small step inside a larger machining workflow, the cheapest standalone engraver may not create the best overall result. If the job is mostly traceability marking, a full CNC solution may be unnecessary overhead. The decision hinges on how much of the part’s processing can be consolidated without creating new bottlenecks.

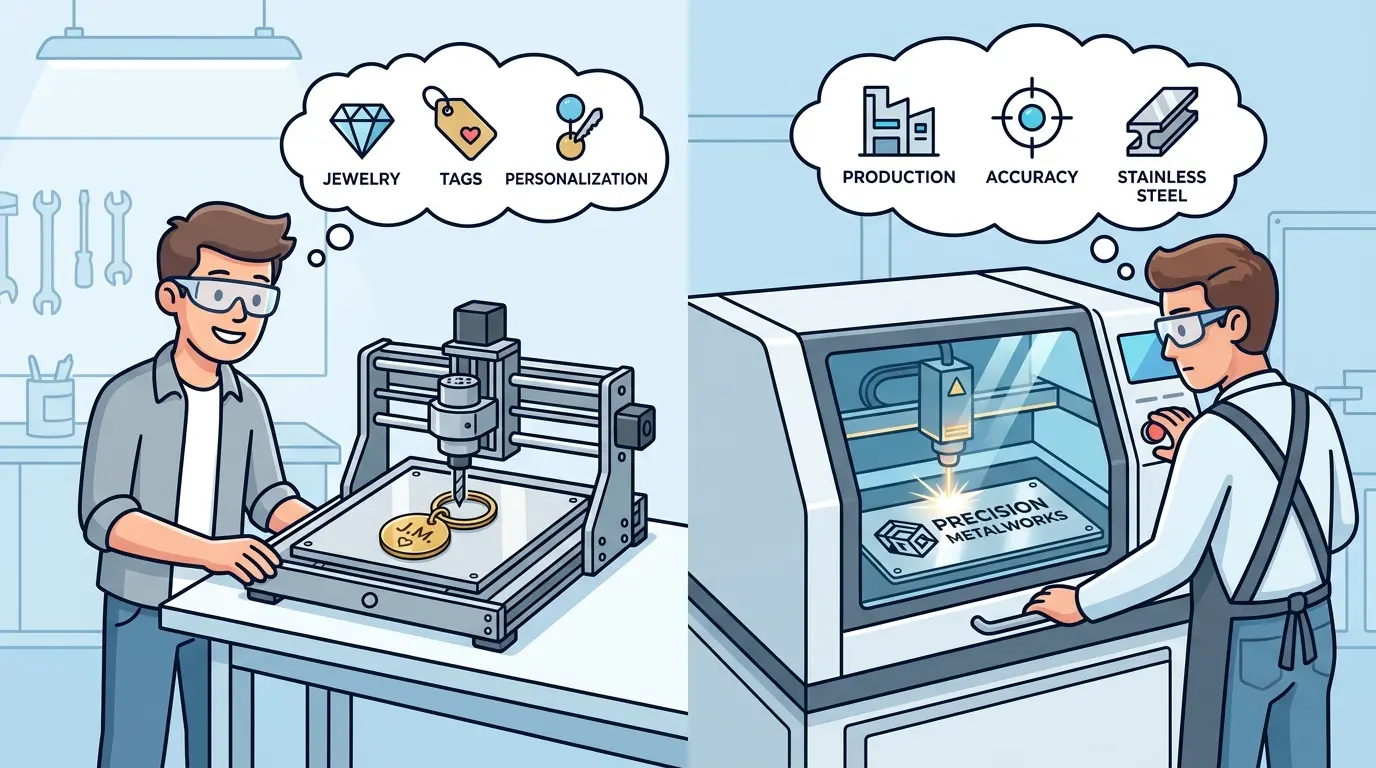
A Practical Decision Table

If Your Real Priority Is… The Process Buyers Often Evaluate First
Fast serial numbers, logos, or compact codes on finished metal parts Fiber laser marking or engraving
Deeper visible text or plate engraving with defined cut geometry Mechanical rotary engraving
Rugged identification on rough or uneven industrial parts Dot peen or micro-percussion
Durable line marking with lower noise on larger industrial parts Scribe marking
Engraving combined with milling, drilling, or other metalworking steps CNC engraving or machining center

This table is a shortlist, not a rulebook. Final selection should still be tested against the actual part material, surface condition, part geometry, required cycle time, and downstream handling. The same part family can shift between process categories if the mark standard changes. A part that currently needs only a visual serial number may later require a scanner-readable data matrix code, which changes the process evaluation.

Common Buying Mistakes That Lead to Rework

One common mistake is buying by machine label instead of mark outcome. A buyer may ask for engraving when the real need is durable traceability. Another buyer may ask for marking when the part actually needs a deeper cut that remains visible after later finishing steps. The terminology mismatch leads to comparing the wrong machine categories and selecting a system that cannot deliver the required result.

Another mistake is testing only ideal sample pieces. Real production parts may arrive with oil, surface variation, curved geometry, coating differences, or looser presentation than the demo sample. If the test does not reflect that reality, the machine decision is built on weak evidence. The correct test protocol uses actual production parts, in the same condition they arrive at the marking station, with the same fixturing that will be used in the live cell.

Fixturing is also underestimated too often. Even a strong process becomes inconsistent if part position changes from cycle to cycle. The machine does not work alone. Repeatability often depends just as much on workholding, loading method, and verification discipline. A laser system with a short focal length lens requires precise part positioning to maintain focus. A mechanical engraver needs rigid clamping to prevent vibration-induced depth variation. A dot peen marker needs consistent part orientation to produce evenly spaced dots.

Verification is another overlooked element. If the mark must be read by automated scanners, the verification system should be part of the initial evaluation, not an afterthought. A mark that looks acceptable to the human eye may fail a scanner check due to insufficient contrast, incorrect module size, or edge distortion. Testing with the actual scanner model used downstream prevents this mismatch.

Finally, some factories focus too much on headline power or spindle capability without asking whether the surrounding workflow can use it. A faster source does not solve slow loading. A deeper-cutting machine does not solve unclear mark standards. The better investment is the one that removes the real bottleneck. If the marking station is already fast enough but the verification step creates a queue, adding a faster marker will not improve throughput.

Think Beyond the Engraving Station

In many factories, metal engraving is only one step inside a wider production flow. The part may be cut, machined, finished, inspected, marked, and packed in sequence. That means the right machine should be judged not only by the quality of the mark, but by how cleanly it fits the rest of the operation.

Consider the material flow. Does the marking station sit inline with the machining line, or is it a separate bench operation? Inline marking requires a machine that can keep pace with the upstream cycle time and integrate with the existing conveyor or robotic handling. Bench marking allows more flexibility but adds a handling step that can become a bottleneck.

Consider the data flow. Traceability marks often need to be generated from a production database or MES system. The marking machine must accept variable data, manage program selection, and log the marking results. A machine that requires manual data entry for every part will slow the line and introduce error risk.

Consider the maintenance burden. Laser systems require periodic cleaning of optics and calibration of focus. Mechanical engravers need regular tool changes and spindle maintenance. Dot peen markers need stylus replacement and air supply maintenance. The maintenance schedule should fit the available technical staff and the production calendar.

For manufacturers reviewing engraving needs alongside broader workshop planning, the Pandaxis product catalog can help frame engraving as part of a larger equipment-layout decision rather than as a completely isolated purchase. The same facility that needs metal engraving may also be evaluating panel processing, edgebanding, or other production equipment, and the layout decisions should be coordinated.

How to Run a Meaningful Machine Test

Before committing to a purchase, run a structured test that reflects production reality. The test should include the following elements:

  1. Use actual production parts, not polished sample coupons. Include parts from different batches to capture material variation.
  2. Apply the same surface condition that parts have when they reach the marking station. If parts arrive with oil or coolant residue, test with that residue present.
  3. Use the production fixture or a close approximation. If the fixture is not yet designed, test with the clamping method you plan to use.
  4. Run the mark at the production cycle time, not at a slower demonstration speed. Measure the actual cycle including loading and unloading.
  5. Verify the mark with the same scanner or inspection method used downstream. Record the pass/fail rate across a meaningful sample size.
  6. Test the mark after downstream processes. If the part is painted, blasted, washed, or handled after marking, run those processes on the test parts and re-check the mark.

This test protocol takes more time than a quick demonstration, but it produces evidence that supports a confident purchase decision. The cost of running a thorough test is small compared to the cost of installing a machine that creates rework.

What Actually Drives the Cost of Metal Engraving

The purchase price is only the first cost layer. The total cost of ownership includes consumables, maintenance, tooling, energy, and the labor associated with setup and operation.

For laser systems, the main consumables are the laser source itself, which has a rated service life, and any assist gas used in the process. Fiber lasers generally have long source lifetimes, but the cost of replacement should be factored into the long-term budget. The system also requires periodic cleaning of the scan head optics and calibration of the focus position.

For mechanical engravers, the cost driver is tool wear. Carbide cutters have a finite life that depends on the material being cut and the cutting parameters. Diamond tools last longer but cost more upfront. The tool cost per part should be calculated for the specific material and depth requirement.

For dot peen markers, the stylus wears over time and the air supply system requires filtration and maintenance. The cost per mark is generally low, but the system needs a reliable compressed air supply.

For CNC systems, the cost structure includes tooling, programming time, and the overhead of a larger machine. If the machine is used only for engraving, the cost per part may be higher than a dedicated engraver. If it replaces multiple operations, the cost may be justified by reduced handling and improved consistency.

Energy consumption also varies by process. Laser systems draw significant power during operation. Mechanical engravers draw less but require spindle power. Dot peen markers use compressed air, which has its own energy cost. The differences are usually small relative to labor and rework costs, but they matter for high-volume operations.

Selection Focus: Metal Engraving

The right metal engraving machine is the one that matches the real production requirement, not the broadest market term. The deciding factors are usually mark purpose, permanence, surface condition, part geometry, and how the engraving step fits the pace of the line.

For fast traceability and fine detail, laser often leads the shortlist. For true cut depth, mechanical engraving becomes more compelling. For rough industrial IDs, dot peen or scribe may be more practical. And when engraving sits inside a broader machining cycle, a CNC-based solution can be the smarter choice.

The safest buying logic is straightforward: define what the mark must do after the part leaves the station, test on real production parts, and choose the machine that supports the full workflow rather than the best-looking sample alone. A machine that produces a clean mark on a polished coupon but fails on a production part with oil residue and surface variation is not a good investment, regardless of the specification sheet.
The selection process should also account for future changes. If the product line is likely to shift toward denser codes, different materials, or higher throughput, the machine should have headroom for those changes. A system that barely meets today’s requirements may become a bottleneck sooner than expected.

Finally, involve the operators and maintenance staff in the evaluation. They will live with the machine daily, and their input on ergonomics, setup complexity, and maintenance access can prevent a technically sound but operationally awkward purchase. The best machine is the one that the team can operate consistently and maintain without excessive downtime.

What you can read next

What Is a CNC Machine Casting and Why Does Machine Structure Matter?
Jaster CNC, Raven CNC, Mysweety CNC, Wright CNC, and Pratic CNC: Which Budget CNC Brands Are Worth a Closer Look?
Types of CNC Machines Explained: Mills, Lathes, Routers, Lasers, and More

Recent Posts

  • CNC Machine Plans When Plans Save Money and When They Create Rework

    CNC Machine Plans: When Plans Save Money and When They Create Rework

    CNC machine plans promise a lower purchase bill...
  • CNC Simulator Tools

    CNC Simulator Tools: When Virtual Testing Saves Time and Scrap

    Every CNC program that reaches the floor with a...
  • Laser Engraver for Wood

    Laser Engraver for Wood: Best Use Cases in Commercial Production

    Commercial wood shops routinely face a bottlene...
  • What Is a CNC Slicer

    What Is a CNC Slicer? Common Meanings and Use Cases

    When a purchasing team or production engineer s...
  • Big CNC Machine vs Small CNC Machine

    Big CNC Machine vs Small CNC Machine: How Size Changes Cost and Capability

    Production teams comparing CNC platforms often ...
  • Automatic Edgebander vs. Manual Edge Banding: Which One Delivers Better ROI?

    When edge finishing becomes the bottleneck, the...
  • Wall Saw

    Wall Saw Safety, Blade Selection, And Cutting Strategy For Controlled Structural Cuts

    Wall sawing fails most often before the blade e...
  • What Are CNC Bushings Used For?

    When an axis develops a vague roughness or surf...
  • Root CNC, RS CNC, and PrintNC-Style Open Builds

    Root CNC, RS CNC, and PrintNC-Style Open Builds: Which DIY Community Platform Fits You?

    Community CNC names like Root CNC, RS CNC, and ...
  • Laser Glass Cutter

    Laser Glass Cutter: Where It Fits in Production and Where It Does Not

    The production question comes before comparing ...
  • CNC Stone Cutting for Quartz, Granite, and Marble: How Material Differences Shape Machine Choice

    Quartz, granite, and marble share a fabrication...
  • Small CNC Mill vs Industrial CNC Mill

    Small CNC Mill vs Industrial CNC Mill: How Capacity Changes the Decision

    Shops comparing small CNC mills against industr...
  • Sheet Metal Laser Cutter

    Sheet Metal Laser Cutter Best Practices for Clean, Accurate Cuts

    Laser-cut defects rarely surface at the cutting...
  • What Is a Spiral Milling Cutter

    What Is a Spiral Milling Cutter?

    Buying a “spiral milling cutter” by...
  • Central Machinery Mill CNC Conversion vs Manual Mill CNC Conversion: Which Retrofit Path Is Better?

    Before you commit to a retrofit, the real decis...

Support

  • About Us
  • Contact Us
  • Company Blog
  • Terms of Service
  • Privacy Policy
  • Sitemap

Newsletter

Subscribe for Pandaxis product updates, application insights, and practical news on CNC woodworking, stone fabrication, and laser processing solutions.

GET IN TOUCH

Email: info@pandaxis.com

Whether you are looking to integrate a high-speed CNC woodworking line or deploy a heavy-duty stone cutting center, our technical engineers are ready to optimize your production. Reach out today to bring precision to every axis of your facility.

  • GET SOCIAL

© 2026 Pandaxis. All Right Reserved.

TOP